Author: jenni.godley

  • Shepherd’s Pie – Peasant Food at its Finest

    Shepherd’s Pie – Peasant Food at its Finest

    Welcome back dear reader, and here’s a cup of coffee and a warm chocolate chip muffin for you! Sit down and let’s chat.

    I’ve been thinking about how I save money on food. Let me introduce you to Peasant Food.  Calling someone a peasant could be considered an insult, but in these tough economic times, it helps to look at how low-income people around the world have fed themselves.  There’s no shame in eating like a peasant; they raised families for many generations with much less income and food availability than we do now.  Let’s learn from our ancestors!

    A good definition:  Peasant Food refers to traditional, rustic dishes created by rural working classes using local, affordable, and zero-waste ingredients.  These recipes rely heavily on cheap, filling carbohydrates like grains, legumes (peas, beans), and root vegetables.

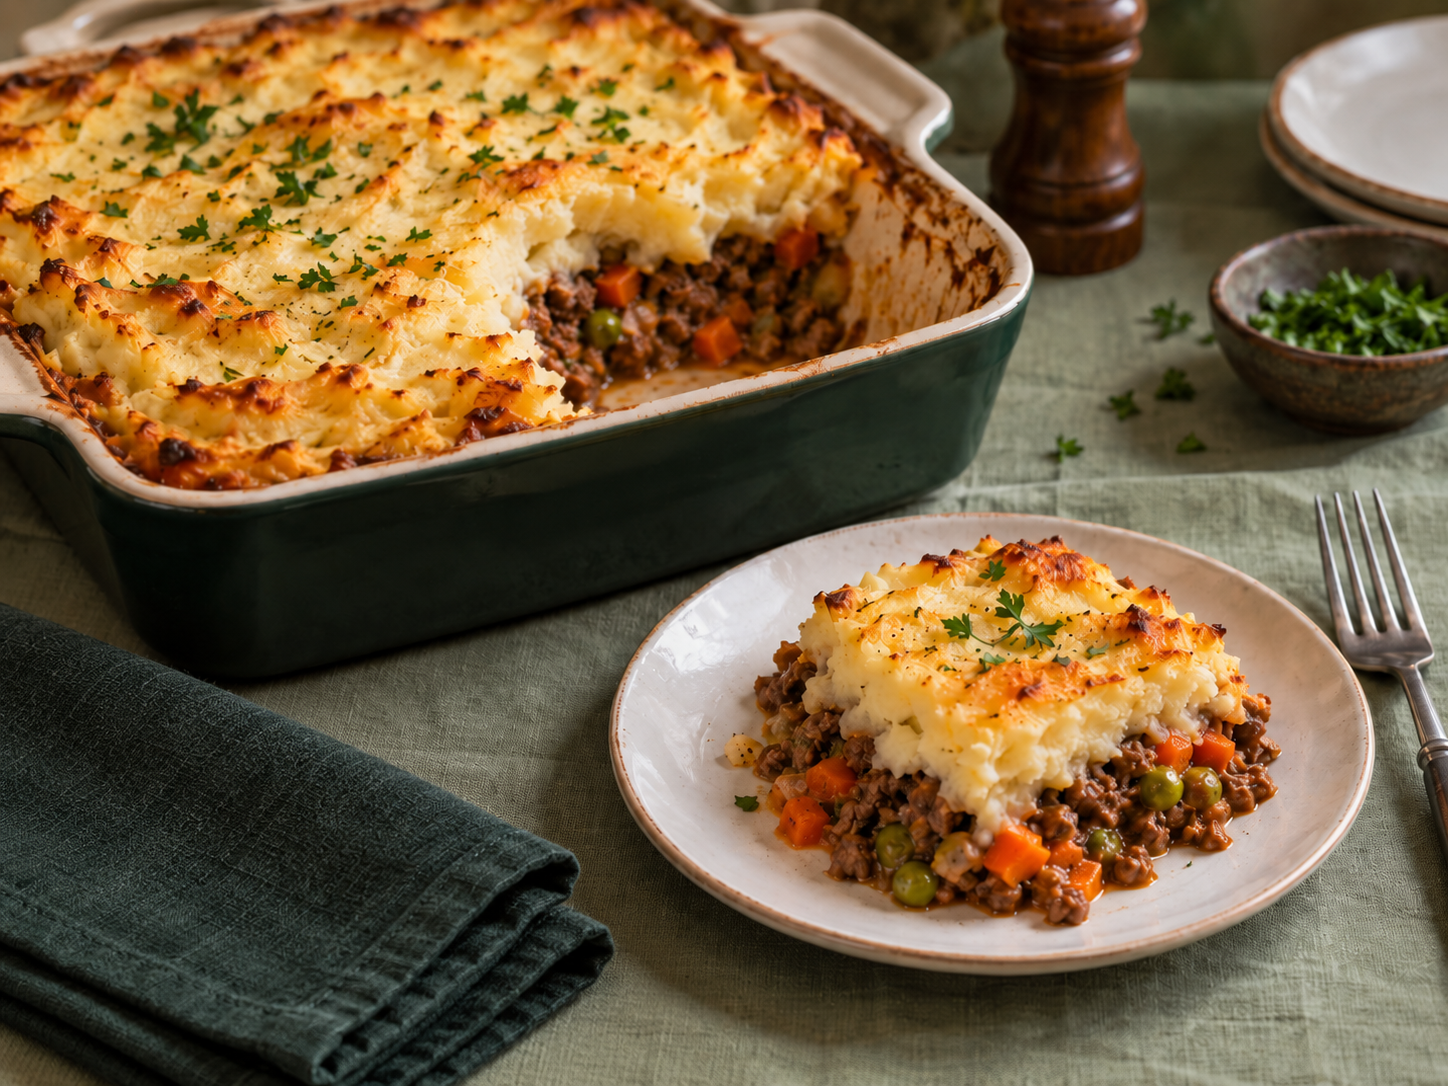
    A classic example of peasant food is Shepherd’s Pie, a common dish from the UK and Ireland. A traditional shepherd’s pie is made with ground lamb, which would have been available very cheaply as the area is well suited for raising sheep.  The more Canadian version that I grew up on is made with ground beef, what British people refer to as Cottage Pie.  For this recipe I’ll be referring to the ground beef version, since ground beef is easier to source and much less expensive here. 

    Shepherd’s pie is made from ground meat and diced vegetables in a rich gravy, topped with mashed potatoes.  I won’t give you a strict recipe, it’s a meal designed to use up leftover vegetables, and it’s a simple technique.  Read through the whole technique before starting!

    The Technique

    Brown ground beef and onions. Add cubed vegetables like carrots and celery and continue to brown.  Make gravy (Bisto is a mix easily found in grocery stores, Trio gravy also works well). Gravy mixes tend to be salty but you could add pepper, paprika or smoked paprika, onion powder, etc.  Definitely add a good teaspoon or more of Worcestershire sauce, which enhances any beef dish.  When the gravy is thick, add it and the meat and vegetables to a Dutch oven or casserole dish.  Cover with a layer of leftover mashed potatoes.  Growing up in a middle-class home with a Scottish/Irish background, we had mashed potatoes 2 – 3 times a week, so leftover potatoes were always in the fridge.  Heating them a little in the microwave makes them easier to spread, but don’t worry about a fancy swirled top, this is rustic food.  Dot the potatoes with butter and bake uncovered until it’s hot and bubbly, finishing the dish under the broiler if necessary to brown the top of the potatoes.  This is delicious, and easy to adapt to whatever needs to be used from the fridge – bits of bacon and other cooked meats, mushrooms, peas, corn, green beans, cubed rutabaga (yellow turnip).   That delicious gravy just makes it all work together.

    Let me know if you want more posts like this by leaving a comment. I’m open to other suggestions on future topics related to using what you have to make life better!

  • Cloth Napkins – an Easy Project

    Cloth Napkins – an Easy Project

    Here’s an easy project you can make that saves you a few pennies every day.  Cloth napkins are quick to make, look nice on your table, and save money on paper towels or paper napkins.  You can maybe keep your kids from wiping their hands on their clothes at the table, too!

    Reuse old Textiles

    I like to make napkins from old towels, cut into rectangles.  I serge the edges to prevent raveling, but if you don’t have a serger, you can do a wide zig-zag with a short stitch on a basic sewing machine.  If you don’t want to sew at all, terry facecloths from the dollar store also make great napkins.

    Other Ideas 

    Other textiles you can cut up for napkins are tea towels (that would be a dish towel if your Granny wasn’t Scottish), and flannel from pajamas, using multiple layers for a thicker napkin.  If you buy napkins from a thrift store, they often have stains, which can be hidden by embroidery or dyeing. You can dye any of these fabrics to coordinate with your kitchen or dishes.   10 by 11  inches is a good size for a napkin, but adapt the size to the fabric you have.

    A few pennies at a time

    Have fun creating frugal and pretty napkins, save a few pennies a week on paper products, and again, celebrate your commitment to create a Use What You Have Home!

  • Taking Stock – Part 2 – Skills

    Taking Stock – Part 2 – Skills

    Come on in and sit down, dear reader!

    A Use What You Have Home requires that you know what you have. We’ve already talked about doing a full inventory of the food in your house. And why is that important? Knowing what food you have, and roughly where it is, helps you meal plan and not overbuy. Let’s continue to compile information on what we have, this time thinking about skills and information. Consider these skills and resources, and make a list of what you have, including any others you may think of.

    Skills

    – can you knit, crochet, make and repair clothing or quilt?

    – can you do simple household repairs?

    – automotive repair?

    – grow food?

    – preserve food by canning, freezing, dehydrating?

    – butchering?

    – raise/hunt food animals – meat, fish, eggs, milk?

    – cheese making, sourdough baking, kombucha making?

    – making/using herbal remedies?

    – soap or candle making?

    – baking?

    These skills mean you can make or repair something yourself, which saves money.  You might be able to make some money by offering your skill to others.  Or, you can barter with neighbours and friends – George across the street has a rototiller, but he has clothing that needs to be repaired and he can’t even thread a needle.  I can hem, replace buttons, and mend holes in jeans in exchange for George tilling my garden. You might even make some money offering a class, so others can learn from your experience.  Or ask a grandmotherly-type to teach you to knit if you bring her a coffee or some cookies every time you get together.  Hanging out with an older person is just a great opportunity for friendship and for you to learn how they survived tough times.  

    Information

    Do you have access to any of the following?

    – A community of friends/family that barter and share garden produce, raise animals, build and repair things, enjoy teaching their skills

    – A home library of non-fiction books –  homesteading skills, food preservation etc

    – A nearby public library and the skills to look for helpful books and resources

    – YouTube University – it’s not an official place, it’s just how my husband and I refer to learning new skills by watching YouTube videos.

    Supplies

    Do you have a vacuum sealer, sous vide set up, scoby for kombucha, sourdough starter, basic tool kit, sewing machine, freezer, dehydrator, canning pot and jars? A basic food dehydrator, your grandmother’s recipe book, a box of well-used jeans? Check out the things you’ve been storing in your basement or attic, and things in your parent’s basement and attic. There may be supplies there to start an old-fashioned hobby.

    Why This Inventory Matters

    It’s so easy to look at the modern homesteaders on social media, and be overwhelmed before you even begin to learn a new skill.  “They” have a freeze dryer, laying hens and a 1/2 acre garden.  They may have a huge kitchen, with 2 gas stoves and a wood-burning pizza oven.  It’s “easy” for them to be self-reliant, we think.  And it’s “too hard” for us.  Let’s put aside some of our pre-conceived ideas about being self-reliant.  We can start where we are, even with a small income, even with very few skills, even in a tiny house in town.  I hope this inventory has shown you that you do have some skills, even if you think they are not that important.

    Take Your Time

    You should learn one skill at a time, and practice that skill for a couple of months before starting on another learning curve.  You will fail sometimes, and with each failure, you will learn how to do things better.  You might decide this skill is bringing you nothing but stress, or you may decide to press on and try again.

    Do it the Old-Fashioned Way

    Every “old-fashioned” skill you learn will give you self-confidence, provide a low-spend hobby, and help you make and maintain items for your home.  Keep in mind: it is tempting to spend a lot on supplies when starting a hobby.  Take your time, buy the absolute basic supplies and put the word out that you are looking for great deals on <name the hobby>.  For example,  when I say quilting, I’m not talking about starting with making a complicated king-sized quilt with designer fabrics (easily $30 per meter in 2026).  I’m referring to the kind of quilts my grandmother made, constructed of recycled fabric from old clothing, filled with an old blanket or a beyond-repair older quilt.  When you are learning to quilt, don’t get caught up buying new fabrics, patterns and a new sewing machine.  You need a basic straight stitch machine (unless your hand sewing is very tiny and neat), some thread, some kind of filling, a sheet for the back, and scraps for the front. Start with a couch quilt, or even a pot holder if a whole quilt is intimidating.    It’s nice to work with crisp, beautiful batik fabrics, 100% cotton thread and bamboo batting, but a scrap denim quilt tied with yarn, and a used blanket for the back keeps you just as warm, and can be machine washed and dried without fear.  On a cold night, a warm quilt over your feet means you can turn down the thermostat a couple of degrees and save a few pennies – aren’t you clever?

    Adding Supplies

    What if you don’t have what you need to finish a particular project? Before buying new at full-price, look for sales on the supplies, check thrift stores and put out the word that you are learning to can food to save money and would love any jars, recipes and tools that anyone wants to share. Once my friends knew I love to sew with recycled garments, I started receiving boxes of fabric, garments, scraps, lace and doilies, buttons etc. I also regularly pass on sewing supplies I’m not using to other sewists. We have a social media page for folks in our church to give away household goods, dishes, clothes, etc. It’s as much fun to fill a need as to receive something!

    Make a Small Goal and Give it a Try!

    Spend a little time in the next few days taking stock of your skills, and next steps you could take to use those skills more.  Or plan to research a new-to-you skill, at the library or using Youtube.  Ask friends for information, help learning or supplies they no longer need.  And celebrate your willingness to try new things!
  • Extracting Value

    Extracting Value

    I recently watched a video from one of my favorite YouTubers – her name is Leisa, and the channel is Sutton’s Daze.  Leisa reminded me of a concept that I learned by watching my parents and grandparents practice it.  Anyone who lived through the Great Depression knew and lived by it, because it was an important means of survival.  

    The concept: 

    Don’t waste what still has value.

    Leisa’s video gave good examples – the bones from a rotisserie chicken can be used in bone broth and vegetable peels and scraps can be put in the compost, given to chickens, or frozen for making stock.  The can of bacon fat at the back of Granny’s stove looked a little gross, but it made flavorful cooking oil, or was used in place of butter in bread dough.  Scraps of slightly stale bread can be frozen and collected for homemade croutons or bread crumbs.

    Bacon Fat

    I thought of a few more things that we do in our home to extract  value from things that might be thrown away.  My husband does a lot of the cooking.  He saves bacon grease in a coffee cup, but strains out the solids so that it is just beautiful white fat.  His mother was an expert bread baker and she used bacon fat for pie crusts, both sweet and savory pies.  

    Saving Cracker Crumbs?

    I often save the crumbs from the box of crackers or potato chips, to add to our coating mix bag.  We keep a ziplock in the fridge freezer with flour, a good amount of salt and pepper, paprika, onion powder, garlic powder, parsley flakes, dried bread crumbs, cracker and chip crumbs and a small amount of grated parmesan.  This generic coating mix works well for homemade chicken burgers and nuggets, also added to meatballs and meatloaf, to coat fish or onion rings.  It takes seconds to add a bit of leftover crumbs to a freezer and you get a free coating mix without any weird chemicals.  

    An Avalanche of Produce

    Summer produce ripens all at once, but you don’t have to choose between canning in sweltering heat or letting it go to waste. With tomatoes,  I take out the stem and freeze the tomatoes whole.  In the colder months, when it makes more sense to heat up your kitchen with boiling water, you can make tomato products to freeze or can.  I thaw the bags of tomatoes in the sink overnight and then the skins slip right off those limp tomatoes.  This also extracts a lot of the water, so cooking sauces takes a lot less time.  I am told, although I haven’t tried it yet, that tomato skins can be dehydrated for a delicious tomato powder.

    You can also freeze summer berries to make jam in the winter, when you want heat and humidity in your house.

    Textile Talk

    You can definitely extract more value from old clothing and household linens.  Worn clothing can be refreshed by over-dyeing, particularly faded jeans.  Worn clothing still has a lot of usable fabric – cut up that man’s poly-cotton shirt and reuse the fabric in quilts, patches for mending and upcycling.  I will have many more posts in the coming days that give you ideas and how-to’s for overdyeing, and reusing fabric.

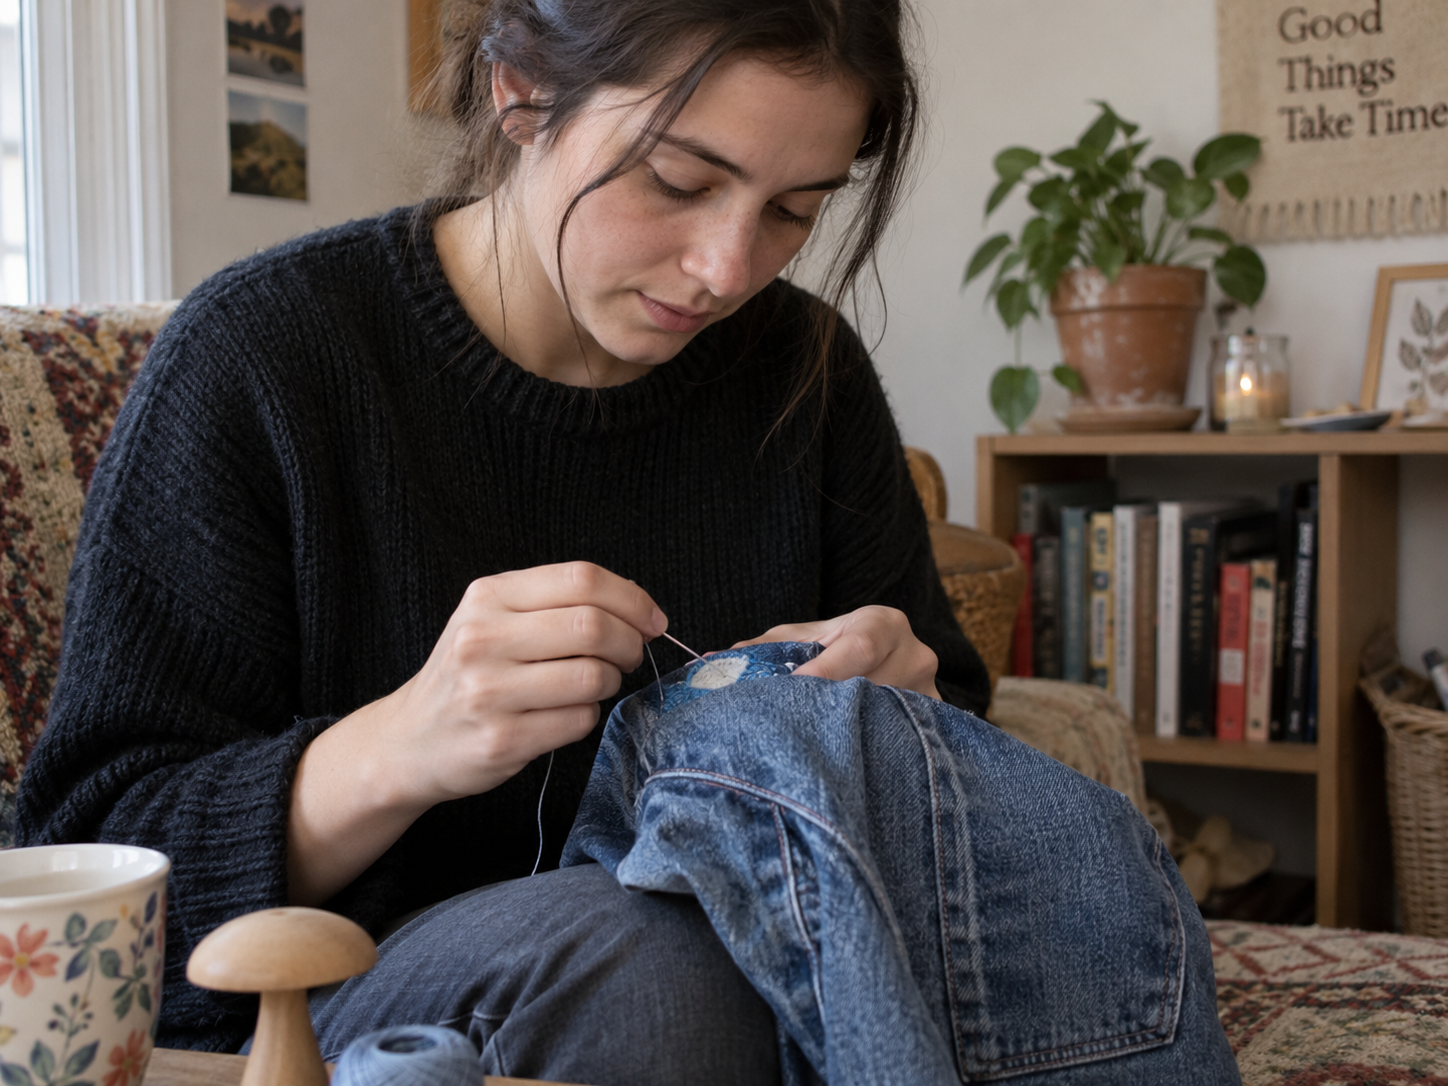
    Speaking of worn clothing – mending is trending!  There are lots of Youtube videos on visible mending, and library books on mending and darning.  Darning socks is regaining popularity!  Learn to darn and your socks and sweaters will last for years.  Darning and mending by the fireplace during a snow storm is the ultimate cozy project.

    In Conclusion

    I’m sure you can come up with other ways to extract more value from the things in your home.  You can choose one or two of these ideas, and start putting them in practice today.  Definitely start thinking “what else can I use this for” before throwing anything out.  You’ll feel so clever and confident when you make something for free out of scraps.

  • Getting Started:  Taking Stock of What You Have

    Getting Started: Taking Stock of What You Have

    Welcome back!  Pull up a chair, I’ll pour you a coffee, and we’ll talk about how you, too, can have a Use What You Have home.  The good news is that it’s not about buying 50 organizing bins, getting a huge load of groceries or running through your house like a whirlwind, bringing it to order in one session.  This is definitely a marathon and not a sprint.  This is about taking small, manageable steps with no spending at all until it’s the right time.  You can do this!

    Start By Knowing Where You Are

    How can you get started?  It’s the same for everyone – you have to know where you are.  Beginning with the food category, I will walk you through taking stock, just like grocery stores used to in pre-computer days. 

    You’ll count and write down every can, bottle, freezer bag, etc of food in your home.  You don’t need to do it in an hour, or even one day.  I did a recent inventory over the course of a weekend, one area at a time, working about 20 minutes per area.  

    Don’t Let the Inventory Drag On

    I wouldn’t spread this inventory over too long a period, since you probably prepare and eat food multiple times a day, and that changes your inventory.  When you buy groceries, you add to the inventory.  When you prepare a meal, you subtract your ingredients.  Try to complete your inventory within 3 days, even if it isn’t perfect or completely finished.  Future inventories take much less time.  Whether you track it on computer or paper, it’s an ever-changing document.  

    One Area at a Time

    You will want to inventory food in your deep freeze, fridge, cupboards, and shelves of home canning.  Check the place(s) you store huge packs of paper towels, the food you keep in the camper, the spice drawer; whatever applies to your situation.  You might want to inventory only food at first, and that is a great place to start.  On my recent inventory, I took stock of paper products, personal care items like shampoo, food wraps, garbage bags, cleaning products, laundry detergent, and anything else I regularly buy in a grocery store.  You don’t have to do all of this yet, but everything you track will give you a better picture of what you have.  

    Yes, it’s a big list. Or lists, because it helps to write it down by area.  So a “what’s in the fridge” list, “what is on the garage shelves” list, etc.  This does take time, it’s also the best way I know to get started.  You need to know what you have before you can start building a pantry system, and a plan to use up whatever you have.  

    If you discover that you are all out of paper towels (for example), by all means add that to a grocery list.  But I’d advise waiting to finish taking stock before you get a large load of groceries.  Every time you bring groceries in you need to add those items to your inventory, and every time you cook a meal, you need to subtract from the inventory.

    Why Writing it Down Matters


     I can hear you grumbling now, “That sounds like a lot of work!”  I know, and I balked at doing this for years.  But having a paper or computer inventory is the only way to reliably know what you have. There’s nothing worse than going to the freezer to pull out those pork steaks to thaw and discover that they’ve already been eaten, and you need to make a different plan for dinner!  I tried to keep the inventory in my brain, and it’s just about impossible.  It’s far too easy to forget some items until they are freezer burned beyond recognition and inedible.  The Use What You Have Home concept includes reducing food waste. 

    Start With What You Have

    Grab an old notebook and a pencil and start taking stock.  If you get meal ideas while counting, write them down. Just don’t get distracted from recording what you have.  You have made the first step towards a more intentional and predictable pantry, a crucial part of a Use What You Have home!


  • Welcome!

    Welcome!

    A brand-new, shiny blog! Just like a child in Grade One opening a fresh notebook and using a brand-new sharpened pencil, I am beginning to write. And honestly, it’s a little intimidating.

    I have a lot to share, but I’m definitely not a social-media influencer. I’m simply a wife, Mum, and Granny navigating these tough economic times like everyone else.

    For the past 40 years, my husband and I have mostly been a one-income family, with large fluctuations in income along the way. We’ve made plenty of mistakes, but we’ve also learned valuable skills out of necessity. Through all the financial ups and downs, one thing has remained consistent: we’ve always eaten well.

    Now feels like the perfect time to share some of what we’ve learned.

    Whether you’re a homeschooling Mum of six, a young married couple just starting out, or a single person trying to stretch your budget, I hope you’ll find encouragement and practical help here.

    I’ll be sharing:

    • recipes and cooking techniques
    • gardening and food preservation tips
    • book and website recommendations
    • mending and textile recycling ideas
    • budget-friendly quilt-making
    • practical housekeeping advice
    • ways to save money through thrift stores and garage sales
    • and even how “saving money” can sometimes become a financial trap

    This blog is about using what you have, wasting less, learning practical skills, and creating a home with intention and contentment.

    So please consider subscribing, and come find me on Pinterest at UseWhatYouHaveHome.

    Let’s figure this out together — in a non-judgment zone filled with encouragement, creativity, and common sense.